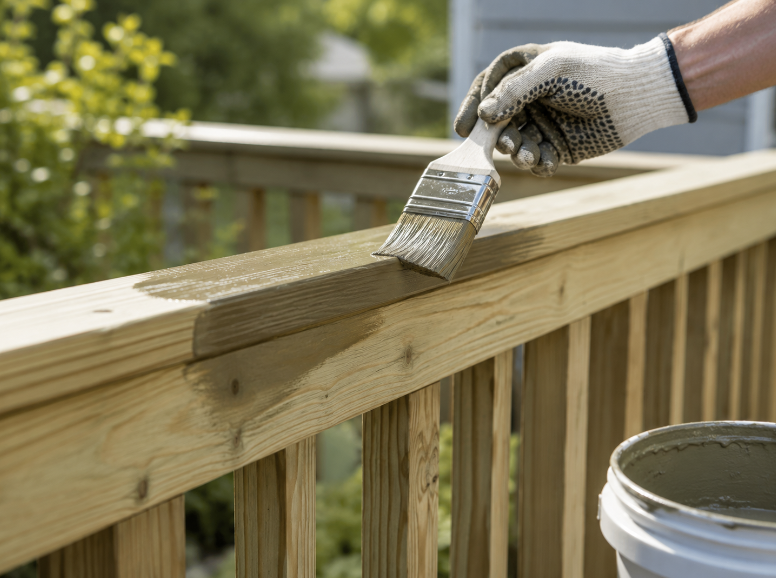
Pressure-treated wood is infused with preservatives to improve resistance to decay, insects, and outdoor exposure. It is widely used for decks, fences, rails, posts, garden structures, and other exterior projects.
New pressure-treated lumber may contain a high level of moisture when it arrives at the building site. Painting it too early can trap moisture beneath the coating and lead to peeling, blistering, slow curing, or uneven adhesion.
The most important preparation step is confirming that the wood is dry enough for the selected primer and paint.
Drying time cannot be determined only by counting days.
Weather, lumber thickness, treatment process, storage conditions, rainfall, ventilation, and local humidity all affect how quickly pressure-treated wood loses moisture.
A moisture meter provides a more useful indication than surface appearance alone.
Compare the reading with the coating manufacturer’s stated moisture limit. Different exterior primers and paints may have different application requirements.
Place several drops of water on the wood.
If the water beads and remains on the surface, the lumber may still contain moisture or treatment residue that limits coating absorption. When the water penetrates gradually, the surface may be more suitable for preparation.
This test is only a basic indicator. A moisture meter and coating instructions provide more reliable guidance.
Check every board for damage, loose fibers, surface deposits, fastener problems, and construction defects.
Some treated lumber develops a light surface deposit during drying.
Clean the wood according to the lumber supplier’s recommendations. Do not assume that a strong acid cleaner or household bleach is suitable for every preservative treatment.
Replace badly split boards and secure loose fasteners before painting.
Paint can improve appearance and surface protection, but it cannot correct unstable joints, unsuitable drainage, or structural deterioration.
Remove dust, mud, mildew, pollen, and construction residue.
Use a cleaner suitable for pressure-treated exterior wood and follow its dilution and rinsing instructions.
High-pressure water used too close to the surface may raise the grain, create grooves, or force water deeper into the lumber.
Use moderate pressure and allow the wood to dry fully again before moving to the next step.
After the wood is dry, sand splinters, raised fibers, and sharp edges.
Work with the grain and remove all sanding dust before applying primer.
Heavy sanding may create uneven absorption or expose a different surface layer.
The goal is to improve smoothness and coating adhesion, not remove a large amount of treated wood.
Wear appropriate protective equipment and follow local requirements for handling pressure-treated wood dust.
Choose a primer specifically approved for pressure-treated lumber and exterior exposure.
Apply it to all accessible faces, edges, joints, and cut ends according to the manufacturer’s instructions.
Cut ends absorb moisture more readily than broad faces.
Use an end treatment, primer, or coating system suitable for the specific preservative-treated wood.
Do not apply ordinary interior primer to an outdoor structure.
High-quality exterior acrylic latex paint is commonly selected for properly prepared pressure-treated wood.
Confirm compatibility between the primer, topcoat, preservative system, and local climate.
Two thin, even coats generally perform better than one heavy coat.
Respect the stated drying and recoating times. Painting in direct hot sunlight, rain, heavy dew, or very high humidity may affect leveling and curing.
Inspect painted pressure-treated wood regularly for peeling, exposed end grain, cracked joints, fastener staining, and trapped water.
Clean dirt and organic growth before they form a heavy layer.
Horizontal areas and cut ends may require maintenance sooner than sheltered vertical surfaces.
Pressure-treated outdoor lumber has different performance and finishing requirements from Wooden Cutting Boards, utensils, storage trays, and decorative home products.
Food-contact kitchenware should not be treated or painted with ordinary exterior coatings. It requires materials and finishes suitable for its intended use.
Outdoor preservatives, furniture coatings, and food-safe board oils are not interchangeable.
Our factory mainly manufactures wooden kitchenware and customized products for home, hotel, gift, and retail applications rather than pressure-treated construction lumber.
Our experience with wood selection, moisture control, product shaping, sanding, assembly, finishing, packaging, and sample development helps buyers create consistent manufactured wooden products.
Customers can submit drawings or physical samples, and our development team can review suitable materials and production methods.
Developing cutting boards, utensils, coffee accessories, storage products, decorative boxes, display units, or customized wooden homeware?
Send us your drawings, samples, intended application, wood preference, dimensions, finish, logo, packaging, and order quantity. We will review the project and prepare an OEM Wooden Products manufacturing proposal.
Previous: